RVX is a graphics framework for replicating low-resolution pixel art scenes in true 3D.
Original proof of concept (YouTube):
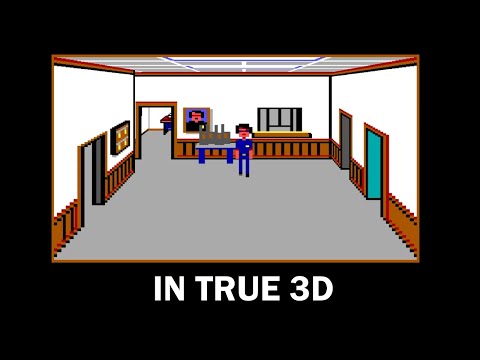
The key concept behind RVX is to model scenes using voxels but render only their front faces.
This retains the pixel-art look and form but there are some drawbacks:
-
Due to perspective voxels in front of the scene are larger than in the back
-
Hidden voxels will sometimes bleed-through around thin corners
Modelling using voxels is far easier than with free-form shapes, and issues can be addressed with modelling tricks and specialised RVX shaders.
RVX has been initially developed for 160x200 EGA graphics but can be used with higher resolutions and color modes.
This repository contains tools to convert, render and export RVX scenes for use with both off-the-shelf and in-house 3D engines.
-
rvx-toolkit converts voxel scenes (modelled using MagicaVoxel) into RVX style and allows exporting to 3D engines, with a sample project provided for Godot Engine
-
rvx folder contains an OpenGL/C rendering library which can be used in custom engines to render RVX scenes, providing more features than 3D exports
-
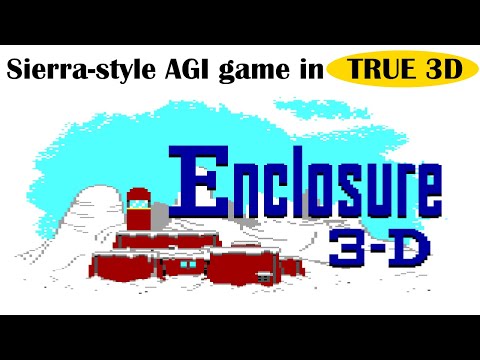
samples folder contains a sample scene from Enclosure 3-D, including a Godot Engine project which runs it.
RVX is a graphics library, it's not a game logic engine - you can incorporate the style into any type of game or engine.
As an artist, you can model RVX scenes and use rvx-toolkit to view the results.
As a developer, you can integrate RVX scenes into your game engine.
- Model the voxel scene using MagicaVoxel
- Use rvx-toolkit for scene setup and live preview
- Export the scene to a 3D engine (Godot, Unity etc.) or use in your own
RVX Toolkit includes a sample scene from Enclosure 3-D for demonstration.
-
Either download the binary release from Releases section, or build from the source using Visual Studio 2022.
-
Start rvx-toolkit, click Scene->Load and open enclosure.rvx from samples folder.

- To see/edit the underlying voxel model, download MagicaVoxel and open enclosure.vox from samples\enclosure-assets folder.

- If you have Godot installed, open project.godot from samples\enclosure\enclosure-assets. If not, start rvx-godot-sample.exe from the binary release of RVX Toolkit.

- If you start the project, you should be able to walk around using arrow keys.

- To live-modify the scene keep all three applications open:
- Make changes in MagicaVoxel (if you're new to MV, use Tab to switch world/object mode, then Paint)
- Click Save in MagicaVoxel
- Switch to rvx-toolkit, it should automatically refresh and reflect the change
- Under Export, click "Wavefront .obj"
- Godot should notice the change and auto-reimport the asset
You can use rvx-toolkit in combination with MagicaVoxel to model RVX scenes.
The toolkit provides a realtime WYSIWYG view (if you have rvx-toolkit and MagicaVoxel open at the same time, as soon as you save changes in MagicaVoxel, rvx-toolkit will auto-refresh) but the modelling process is manual.
To create a new Scene:
- Scene -> New
- Under Blank Construct node you will see scene dimensions, default ones are a good start but you can change them and press Enter to reconstruct. You can always extend the model manually in MagicaVoxel later so these are not binding.
- When you're happy with the size, Save as... scene in a chosen location.
- Click Generate VOX to create a .vox (MagicaVoxel) file with the blank template, you will see the path generated.
- Open the .vox file in MagicaVoxel but keep rvx-toolkit open.
- Whenever you make and save changes in MagicaVoxel, rvx-toolkit will auto-refresh and reflect these. This is the main modelling loop.
- You do not need to separately Save the scene in rvx-toolkit if all you do is change the .vox file. Save only stores view/settings.
- When you're done modelling, proceed to .obj export.
If you'd like to use RVX in your game, you can either:
a) export the scene in Wavefront .obj+.mtl format and import into a 3D game engine (Godot, Unity etc.)
b) if you're writing your own engine, you can use the RVX library to render RVX scenes (written in C using OpenGL)
- size your voxel scene to be at least twice the size of the original pixel scene so that you have more wiggle room to compensate for perspective scaling
- always leave spaces between voxels on depth axis as you will need to access inner voxels which normally wouldn't be visible
- side walls usually have to be extended by 4 or more voxels to eliminate gaps when looking at a sharp angle
Enclosure 3-D is a free adventure game developed using RVX engine:
RVX is licensed under MIT License, you are free to use it in your projects as long as you provide attribution.
Included sample scene from Enclosure 3-D is (c) 2022 Femo Duo Entertainment, All Rights Reserved, included with authors' permission. Do not reuse.
RVX Toolkit incorporates below libraries, see ThirdParty for license information.
- raylib
- open game tools
- Dear ImGui
- GLFW
- glad
- OpenGL Mathematics (glm) for C
- Leksys' INI Parser
- Native File Dialog
RVX Toolkit is designed to work alongside MagicaVoxel by ephtracy.
Sample Godot Engine project includes Aseprite Wizard to import the player sprite from aseprite.
Big thanks to all of the above authors for providing awesome free tools.